
Back
How to Create a New Virtual Machine
This page explains how to use Xen Orchestra to create a new virtual machine on this system.
Users can configure items such as virtual machine templates, CPUs, storage, and networks to create virtual machines suited to their environment and purposes.
Before you create a virtual machine
Before creating a virtual machine and installing the OS, please check the following precautions. »Important Points When Installing Guest OS
The settings may vary depending on the virtual machine template. This page uses “CentOS 7” as an example.
Create a new virtual machine
1. Log in to the Xen Orchestra administration screen
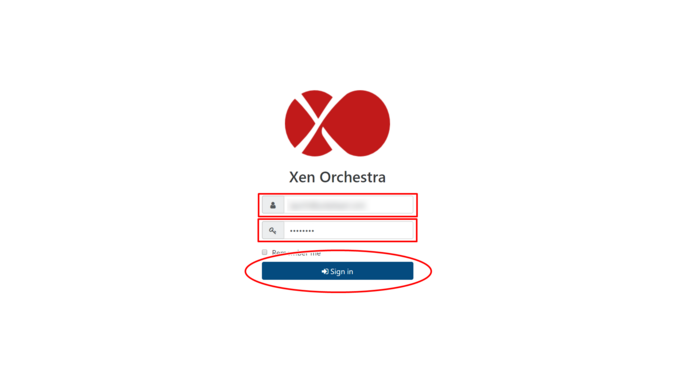
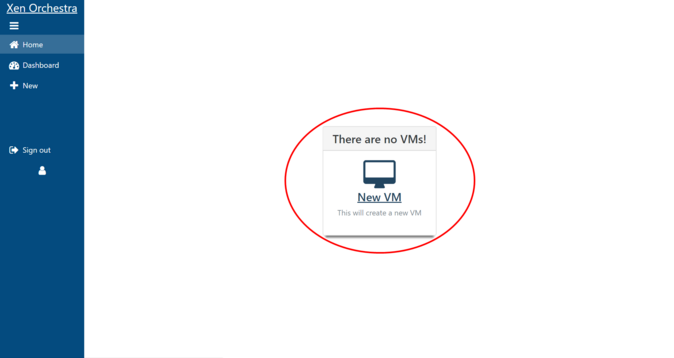
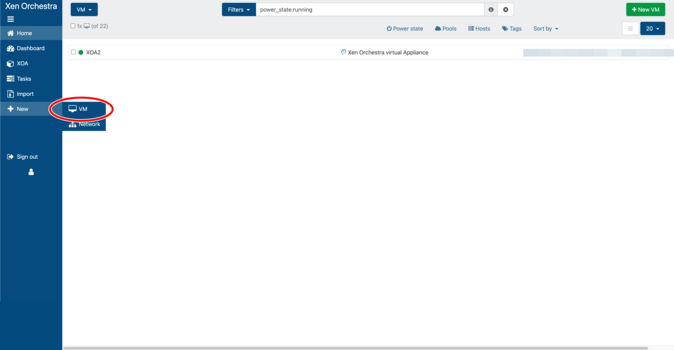
2. Click the Create New button
Click “New VM” on the HOME screen, or “VM” that appears when you click “New” on the menu.
3. Select the virtual machine resources
Xen Orchestra can connect to multiple resources, so you must select the resource in which you want to create the virtual machine.
Open the top pull-down menu “Select pool(s)…” and select the resource in which you want to create the virtual machine.
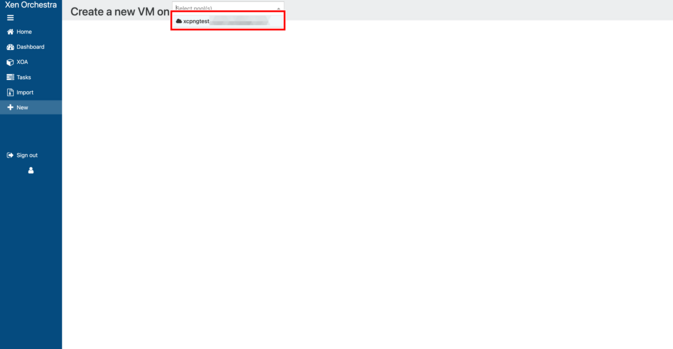
Once you select the resource, a wizard to create a virtual machine will be displayed. Configure the virtual machine you want to create as described below.
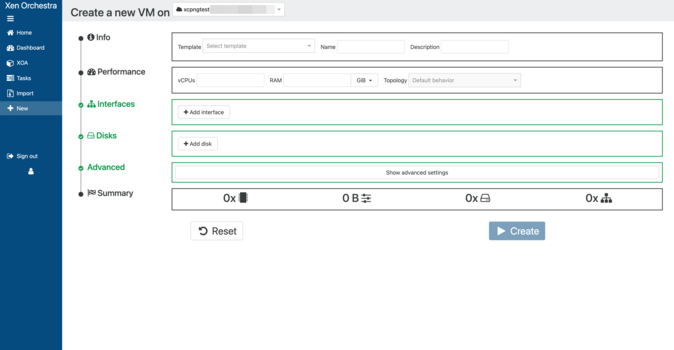
Step 4: Choose a template

- Template: Select the template for the guest OS to be installed.
5. Enter a name and description

- Name: Enter the name of the virtual machine. We recommend using the host name. Be sure to enter this so that you can easily distinguish between virtual machines when deleting unnecessary ones.
- Description: Enter a description of the virtual machine.
Xen Orchestra does not check for duplicate virtual machine names, so enter a name and description that makes it easy to understand the contents of the virtual machine even when viewed on the list screen. These can be changed at any time after the virtual machine is created.
6. Configure the CPU
This sets the VM’s performance (number of vCPUs, RAM, CPU weight and limits), which can be changed after the VM is created.

- vCPUs: Select the number of virtual CPU (vCPU) cores.
- RAM: Determines the amount of memory.
- Topology: Specify the virtual CPU topology. Leave it as the default “Default behavior”.
7. Install the configuration
Select “ISO/DVD” and specify the installation media. Select the one that matches the guest OS you want to install.

Step 8: Set up your network

- MAC: Normally you should leave it blank as it will be auto-generated by the system.
- Network: A list of VNS (Virtual Network Switch) in use will be displayed in a pull-down menu, so select the VNS to connect to.
The following will be displayed on the system, but do not select it.
| Bond |
| Host internal management network |
| Pool-wide network associated with eth0,eth1, etc. |
To add a network interface, click “Add interface” to add an entry field. Select the connected VNS in the same way. Up to seven network interfaces can be added.
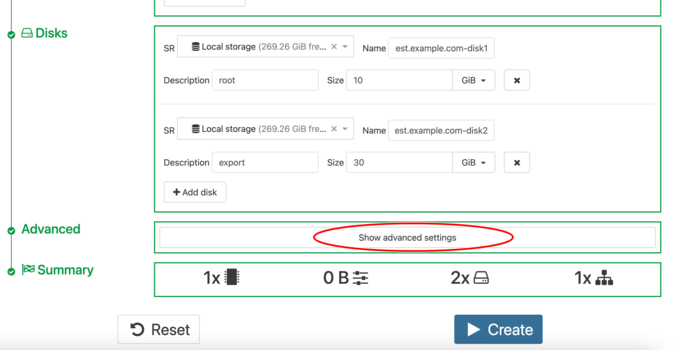
9. Set up the disk

- SR: Select the storage resource.
- Name: Enter the disk name. Be sure to enter a name so that you can easily distinguish the disk when deleting unnecessary disks.
- Description: Enter a description for the disk.
We recommend using the mount point here. - Size: Select the disk capacity.
If you want to add a disk, click “+Add disk” to add an entry field. Select the same storage.
10. Configure advanced settings
Under “Advanced”, click “Show advanced settings”.
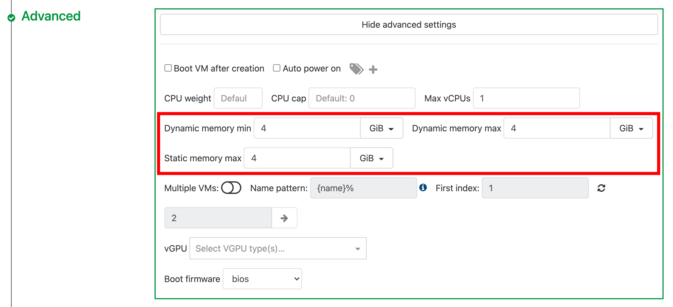
Uncheck “Boot VM after creation”. If you uncheck it, the virtual machine will not start automatically when it is created.
Enter the same memory amounts you set in step 6 into “Dynamic memory min,” “Dynamic memory max,” and “Static memory max.”
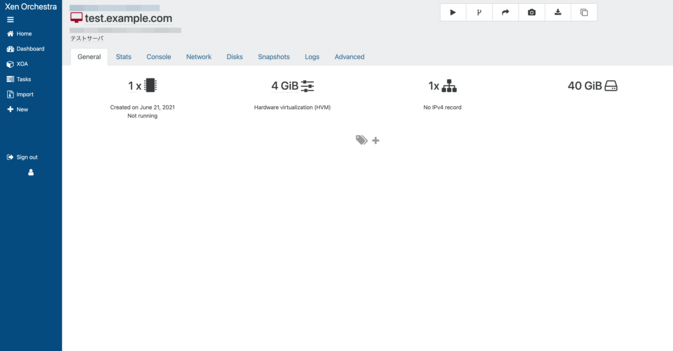
11. Finish creating the virtual machine
After entering each item, confirm the information and click “Create”.

The virtual machine has been created. At this point, the virtual machine is not started.
12. Start the virtual machine
Next you need to install the guest OS. Go to the “Console” tab and press the “Start” button to start the virtual machine.
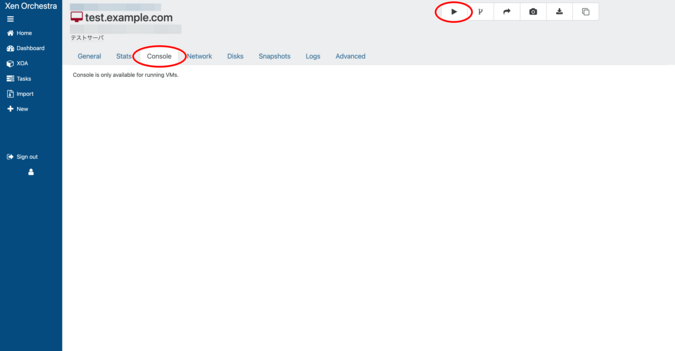
Before starting the virtual machine, please read ” Important Points When Installing Guest OS “. After starting the virtual machine, follow the installer to start installing the guest OS.

 Japan
Japan Korea
Korea China
China Taiwan
 Vietnam
 Thailand
 Indonesia
 Portugal
 Spain
Spain France
 Germany
 Egypt
Egypt Russia
